
crossbow mixing instructions
Crossbow Mixing Instructions: A Comprehensive Guide
Crafting high-performance crossbow bolts demands precision; this guide details the art of assembling components for optimal flight and target impact consistency.
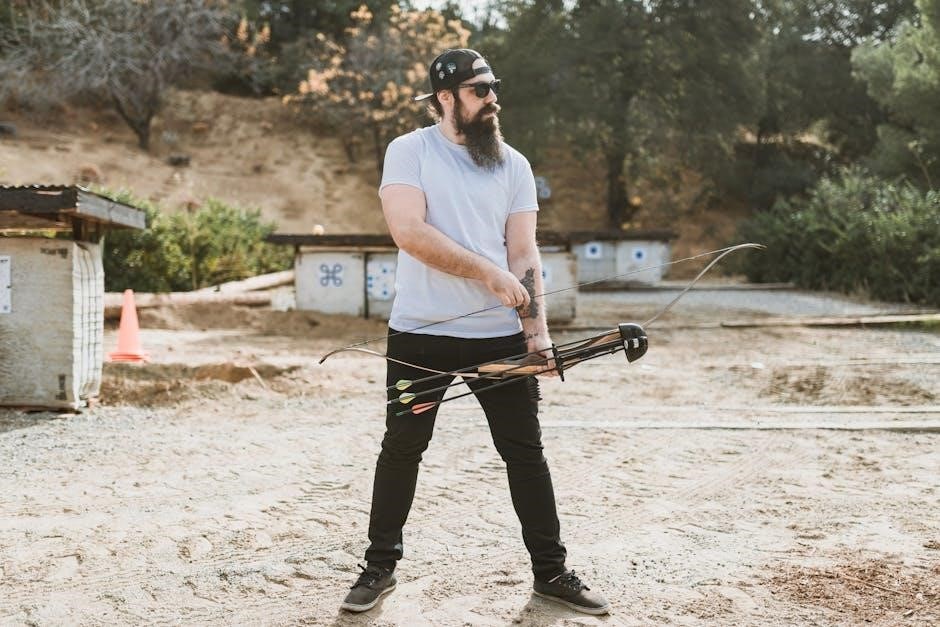
Welcome to the world of crossbow bolt creation! While pre-made bolts are readily available, understanding the process of “mixing” – assembling your own from individual components – unlocks a new level of customization and performance. This isn’t merely about saving money; it’s about tailoring bolts to your specific crossbow, arrow weight, and shooting style.
Properly constructed bolts dramatically improve accuracy, penetration, and overall shooting experience. This guide will walk you through each step, from selecting the right materials to the final quality check. We’ll cover everything a beginner needs to know, and even touch upon advanced techniques for experienced crossbow enthusiasts. Get ready to elevate your crossbow shooting!
Understanding Crossbow Bolt Components
A crossbow bolt isn’t just a single piece; it’s a carefully engineered system of interconnected parts. The primary components include the shaft – the bolt’s backbone, determining weight and stiffness. Then there are the fletchings, crucial for stabilizing flight, and the point or broadhead, responsible for penetration. The nock, of course, engages with the crossbow’s string, initiating the launch.
Each component plays a vital role, and their interplay dictates the bolt’s performance. Understanding how these parts function individually, and collectively, is fundamental to successful bolt mixing. We’ll delve into the specifics of each element in the following sections, exploring material options and their impact on accuracy and durability.
Fletchings & Their Importance
Fletchings, often called vanes or feathers, are the “wings” of the crossbow bolt, providing aerodynamic stability during flight. They counteract the natural tendency of the bolt to tumble, ensuring a straight and predictable trajectory towards the target. Without properly installed and aligned fletchings, accuracy suffers dramatically.
Typically, crossbow bolts utilize three fletchings, though variations exist. Their size, shape, and material (plastic vanes or natural feathers) influence drag and flight characteristics. Larger fletchings offer greater stability but increase drag, while smaller fletchings reduce drag but may compromise stability. Proper fletching selection and precise attachment are paramount for consistent results.
Shaft Material Considerations
Crossbow bolt shafts are commonly constructed from carbon, aluminum, or a composite blend of both materials. Carbon shafts are favored for their high strength-to-weight ratio and excellent durability, resisting bending and breakage upon impact. Aluminum shafts offer a more economical option, though they are generally less stiff and prone to bending.
Composite shafts attempt to combine the benefits of both materials, offering a balance of strength, weight, and cost. Shaft spine (stiffness) is crucial; it must be matched to the crossbow’s draw weight and bolt length for optimal flight. An improperly spined shaft will exhibit inconsistent flight and reduced accuracy. Consider the intended use and budget when selecting shaft material.

Point/Broadhead Selection
The point or broadhead is the forward-most component of the crossbow bolt, significantly impacting penetration and flight characteristics. Field points are typically used for target practice, offering consistent weight distribution and minimal drag. Broadheads, designed for hunting, come in fixed-blade and mechanical varieties.
Fixed-blade broadheads provide reliable cutting power but can increase drag, potentially affecting accuracy. Mechanical broadheads offer improved flight consistency due to their streamlined profile, deploying blades upon impact for a larger cutting diameter. Weight matching is critical; the point weight should align with the shaft spine for stable flight. Always verify legal hunting regulations regarding broadhead types.
Tools & Materials Required
Successful crossbow bolt assembly necessitates a dedicated workspace and specific tools. A stable mixing board or work surface is essential for consistent results. High-quality adhesives, designed for bonding dissimilar materials, are paramount – cyanoacrylate (super glue) and epoxy resins are common choices.
A fletching jig, available in various styles (straight, helical, offset), ensures accurate vane placement. You’ll also need fletching materials – vanes or feathers – in your desired size and color. Additional tools include a sharp knife or razor blade, sandpaper for shaft preparation, a nock removal tool, and potentially a scale for weight verification;
Mixing Board/Work Surface
A dedicated, stable mixing board is crucial for consistent crossbow bolt construction. Ideally, the surface should be flat, non-slip, and large enough to accommodate the arrow shaft, fletching jig, adhesives, and tools comfortably. Consider a board constructed from hardwood or a durable composite material.
Padding the surface with felt or cork can prevent damage to the arrow shaft and provide a quieter workspace. Some boards incorporate built-in rulers and angle guides for precise measurements and fletching alignment. Ensuring the board is well-lit and free from obstructions will significantly improve accuracy and efficiency during the assembly process.
Adhesives: Types & Properties
Selecting the correct adhesive is paramount for secure fletching attachment. Cyanoacrylate (super glue) is popular for its rapid bonding and ease of use, but can become brittle. Epoxy adhesives offer superior strength and flexibility, resisting impact forces better, though requiring longer curing times.
Polyurethane adhesives provide excellent adhesion to various materials and are water-resistant. Consider viscosity – thinner adhesives spread easily but may run, while thicker ones offer better gap-filling capabilities. Always check the adhesive’s compatibility with both the shaft material and fletching vanes/feathers for optimal results and long-lasting performance.
Fletching Jig Options
Fletching jigs are essential for consistent and accurate vane/feather placement. Simple handheld jigs are affordable and suitable for beginners, offering basic straight fletching. More advanced jigs allow for helical and offset fletching, enhancing bolt stabilization and accuracy.
Universal jigs accommodate various shaft sizes and fletching styles, providing versatility. Self-squaring jigs automatically center the fletching, simplifying the process. Magnetic jigs securely hold vanes during adhesive application. Investing in a quality jig significantly improves fletching consistency, ultimately boosting your crossbow’s performance and precision.
Fletching Materials (Vanes/Feathers)
Vanes and feathers are crucial for bolt stabilization during flight. Plastic vanes are durable, waterproof, and consistent, making them popular for crossbows. They come in various profiles – straight, shield-cut, and helical – each affecting flight characteristics.
Traditional feathers offer a natural aesthetic and can provide excellent flight control, but are susceptible to moisture. Feather weight and cut influence performance. Choosing the right material depends on your shooting style and conditions. Higher-quality materials ensure consistent flight and withstand the stresses of high-velocity crossbow launches, improving accuracy and bolt longevity.
Preparing the Shaft for Fletching
Proper shaft preparation is paramount for secure fletching adhesion and accurate flight. Begin by thoroughly inspecting each shaft for any defects or damage. Cleaning removes manufacturing residues, ensuring optimal adhesive bonding; use isopropyl alcohol and a clean cloth.
Nock alignment is critical – ensure it’s straight and securely fitted. Precise measurement and marking of fletching positions guarantee consistent spacing and aerodynamic balance. Utilize a fletching jig’s guidelines for accurate placement. A well-prepared shaft provides a stable foundation for the fletchings, maximizing performance and minimizing the risk of in-flight failures.
Cleaning the Shaft Surface
A pristine shaft surface is non-negotiable for reliable fletching adhesion. Manufacturing processes often leave residual oils or dust that impede bonding. Isopropyl alcohol (90% or higher) is the preferred cleaning agent; it effectively removes contaminants without damaging the shaft material.
Apply the alcohol with a clean, lint-free cloth, wiping along the entire length of the shaft where the fletchings will be attached. Repeat this process until the cloth comes away clean. Allow the alcohol to fully evaporate before proceeding; any remaining residue will compromise the adhesive bond. A clean surface guarantees a strong, lasting connection.
Nock Alignment & Securing
Proper nock alignment is crucial for safe and accurate crossbow bolt performance. The nock must be perfectly indexed to the string, typically with the odd vane (or cock feather, if using feathers) facing away from the bow.
Secure the nock using a high-quality nock adhesive specifically designed for crossbow bolts. Apply a small amount to the nock tenon and firmly press it onto the shaft, ensuring a snug fit. Allow the adhesive to fully cure according to the manufacturer’s instructions before proceeding with fletching. Incorrect nock alignment can lead to dangerous dry-fires or inaccurate shots.
Measuring & Marking Fletching Positions
Accurate fletching placement is vital for consistent bolt flight. Begin by finding the shaft’s balance point; this is generally your starting reference. Most crossbow bolts utilize a three-fletching configuration, spaced 120 degrees apart.
Precisely measure from the nock groove and mark the locations for each fletching using a fine-tipped marker. Consistent spacing ensures stable flight. A fletching jig often incorporates built-in measuring guides for ease and accuracy. Double-check your measurements before applying any adhesive – even slight errors can significantly impact performance.
The Fletching Process: Step-by-Step
Begin by applying a thin, even coat of adhesive to the base of each fletching. Avoid excessive glue, as it can add unwanted weight and create a messy application. Carefully position the fletching onto the shaft at your pre-marked locations, utilizing a fletching jig to maintain proper alignment.
Securely clamp the fletching in place with the jig, ensuring firm contact between the fletching base and the shaft. Repeat this process for all three fletchings. Allow sufficient drying time, as specified by the adhesive manufacturer, before handling the bolt further.
Applying Adhesive to the Shaft
Consistent adhesive application is crucial for secure fletching. Use a specialized applicator – a toothpick, small brush, or adhesive dispenser – to apply a uniform layer to the shaft where the fletching base will contact. Avoid globs or uneven patches; a thin, even film is ideal.
Ensure the adhesive covers the entire bonding surface, but doesn’t run or seep onto areas that shouldn’t be glued. Wipe away any excess immediately with a clean cloth or solvent recommended by the adhesive’s manufacturer. Proper preparation maximizes the bond strength and longevity of your fletchings.
Attaching the Fletchings with a Jig
With adhesive applied, carefully position the fletching base into the corresponding slot of your fletching jig. Ensure it’s seated correctly and aligned with the marked fletching position on the shaft. Gently but firmly press the fletching onto the shaft, applying even pressure across the entire base.

The jig provides the necessary angle and consistent pressure for a secure bond. Hold the fletching in place for the adhesive’s recommended tack-up time – usually a few seconds to a minute – before moving to the next fletching. Repeat this process for all fletchings, maintaining consistent pressure and alignment.
Ensuring Proper Fletching Angle & Offset
Correct fletching angle and offset are crucial for stabilizing bolt flight. Most crossbow bolts utilize a slight helical (spiral) angle, promoting rotation for improved accuracy. The jig typically dictates this angle; verify it matches your desired specification.
Offset refers to the slight angling of the fletchings relative to the nock. This creates a corrective force during flight. A small offset – typically 1-2 degrees – is common. Consistent offset across all fletchings is vital. Double-check alignment before the adhesive fully cures, making minor adjustments if needed.
Advanced Fletching Techniques
Beyond standard straight or helical fletching, several techniques refine bolt performance. Helical fletching, increasing spin rate, excels in windy conditions and longer ranges, demanding precise jig settings. Offset fletching subtly corrects for inherent bow torque or nock pinch, enhancing grouping.

Experimenting with different fletching configurations – such as a combination of vanes and feathers, or varying fletching heights – allows customization. Consider a three-fletching setup for maximum stability or a two-fletching setup for reduced drag. Careful testing is essential to determine optimal configurations for your specific crossbow.
Helical Fletching Explained
Helical fletching imparts a spin to the bolt during flight, dramatically improving stability and correcting for minor imperfections. This is achieved by angling the fletchings as they’re attached to the shaft, creating a corkscrew-like motion. The degree of helix – measured in degrees – dictates the spin rate; higher degrees offer greater stability but can increase drag.
For crossbows, a moderate helix (typically 3-6 degrees) is often ideal, balancing stability with efficiency. Specialized helical fletching jigs are crucial for consistent angles. Proper helical fletching minimizes wind drift and promotes a flatter trajectory, resulting in tighter groupings at extended distances.
Offset Fletching for Accuracy
Offset fletching, unlike straight or helical, positions the fletchings slightly off-center from the bolt’s shaft. This deliberate misalignment introduces a controlled amount of drag, encouraging the bolt to plane during flight. This planing effect significantly reduces wind drift and enhances accuracy, particularly in challenging conditions.
Crossbow bolts benefit from offset fletching because it minimizes the impact of slight nock inconsistencies. A typical offset is around 1-2 degrees, achieved using specialized jigs. Experimentation is key to finding the optimal offset for your specific crossbow and arrow setup, maximizing precision and grouping performance.
Using Different Fletching Configurations
Beyond standard three-fletch setups, crossbow bolts can benefit from alternative configurations. A four-fletch arrangement, with feathers or vanes spaced evenly, provides increased stability and drag, ideal for heavier bolts or those requiring maximum stopping power. Conversely, a two-fletch configuration reduces drag, potentially increasing speed and flatter trajectories.
The choice depends on your crossbow’s specifications and intended use. Experimenting with different vane/feather types within these configurations further refines performance. Consider shorter vanes for speed or longer, stiffer feathers for enhanced stability. Careful testing is crucial to determine the optimal setup for your specific needs and crossbow.
Quality Control & Inspection
Rigorous inspection is paramount after assembling crossbow bolts. Begin by visually confirming each fletching is securely bonded to the shaft, exhibiting no gaps or lifting. Examine the nock alignment, ensuring it’s straight and firmly seated. A slight misalignment can drastically affect accuracy.
Next, a ‘spin test’ – rolling the bolt on a flat surface – reveals any bends or imbalances in the shaft. Finally, allow sufficient adhesive cure time, as specified by the manufacturer, before live testing. Consistent quality control minimizes in-flight failures and maximizes your crossbow’s potential.
Checking Fletching Alignment
Precise fletching alignment is crucial for stable bolt flight. Use a fletching alignment tool or a dedicated jig to verify each vane or feather is positioned identically relative to the shaft’s nock. Look for consistent spacing and angle across all fletchings.
Visually inspect from both ends of the bolt, ensuring no fletching twists or leans. Minor deviations can induce unwanted spin or drag, impacting accuracy and range. Correct any misalignments before the adhesive fully cures; gently repositioning is possible during this stage; Consistent alignment guarantees predictable performance.
Adhesive Cure Time & Considerations
Allowing sufficient cure time for the adhesive is paramount for a durable bond. Refer to the adhesive manufacturer’s instructions – typically, a minimum of 24-72 hours is recommended for full strength. Temperature and humidity significantly impact curing; warmer, drier conditions accelerate the process.
Avoid handling or stressing the fletchings during the cure period. Premature force can compromise the adhesive bond, leading to fletching failure during use. A fully cured adhesive ensures the fletchings remain securely attached, maintaining consistent flight characteristics and maximizing bolt longevity.
Testing Bolt Flight & Adjustments
After the adhesive has fully cured, thorough flight testing is crucial. Begin with a controlled shooting environment at a safe distance. Observe the bolt’s trajectory – look for consistent, straight flight. Any wobble, spiraling, or erratic behavior indicates a need for adjustment.
Minor adjustments to fletching alignment or offset can dramatically improve accuracy. Experiment with slight changes, documenting each adjustment and its effect on flight. Consistent grouping at your desired target distance confirms optimal bolt performance. Remember safety first during all testing phases!

Troubleshooting Common Issues
Even with careful assembly, issues can arise; Fletchings coming loose often indicate insufficient adhesive, improper surface preparation, or inadequate cure time – re-apply adhesive and clamp securely. Poor bolt flight suggests misalignment; check fletching angles and shaft straightness.
Nock issues, like looseness or breakage, may stem from incorrect nock size or excessive force during shooting. Ensure a snug fit and avoid dry-firing. Addressing these problems systematically will restore accuracy and extend the lifespan of your custom bolts. Careful inspection is key!
Fletchings Coming Loose
This is a frequent problem, usually indicating a breakdown in the adhesive bond. Insufficient adhesive application is a primary cause – ensure complete coverage of the fletching base. Poor shaft surface preparation prevents proper adhesion; thoroughly clean and de-grease the shaft before applying glue.
Inadequate clamping pressure during the curing process also contributes. Use a fletching jig that provides consistent, firm pressure. Old or expired adhesive loses its bonding strength. Finally, consider the environmental conditions; humidity can affect cure times. Re-glue with fresh adhesive, paying close attention to these details.
Poor Bolt Flight Characteristics

Erratic flight – fishtailing, porpoising, or tumbling – signals imbalances or inconsistencies. Incorrect fletching angle is a common culprit; ensure consistent angles and offset across all vanes. Uneven fletching weight distribution creates drag imbalances. Weigh each fletching to confirm uniformity.
Shaft straightness is crucial; a warped shaft will never fly true. Improper nock alignment can induce spin. Broadhead weight discrepancies also affect flight. Test with field points first, then broadheads. Finally, check for adhesive residue affecting airflow. Minor adjustments can dramatically improve accuracy.
Nock Issues & Solutions
Loose nocks are a safety hazard and impact accuracy; ensure a snug fit, potentially using nock collars or adhesive (compatible with the nock material). Cracked or broken nocks must be replaced immediately – do not attempt repairs. Incorrect nock orientation can cause the bolt to bind on the string.
Nock wear occurs with repeated use; inspect regularly for damage. Nock alignment issues, if stemming from improper installation, require re-alignment using a jig. String wax buildup inside the nock can cause friction; clean gently. Always prioritize nock integrity for safe and consistent crossbow operation.
Safety Precautions During Mixing
Always work in a well-ventilated area when using adhesives, as fumes can be harmful. Wear appropriate eye protection – safety glasses are crucial – to prevent adhesive or debris from entering your eyes. Gloves are recommended to protect your skin from irritants and ensure a clean grip.
Be mindful of sharp objects like blades and points; handle with extreme care. Never rush the process; focus and precision minimize accidents. Keep a first-aid kit readily available. Dispose of waste materials responsibly. Prioritizing safety ensures a smooth and injury-free bolt assembly experience.
Adhesive Handling & Ventilation
Cyanoacrylate (super glue) and epoxy are common choices, but require careful handling. Always work in a well-ventilated space to avoid inhaling fumes – open windows or use a fan. Avoid skin contact; adhesives bond rapidly. Use a dedicated applicator to control the amount applied and prevent messes.
Store adhesives in a cool, dry place, away from direct sunlight. Clean up spills immediately with the appropriate solvent. Read and follow the manufacturer’s safety instructions on the adhesive packaging; Proper ventilation and cautious application are key to safe and effective bolt construction.
Sharp Object Awareness
Bolt construction involves several sharp tools: knives for trimming fletching, deburring tools for shaft ends, and broadheads themselves. Exercise extreme caution when handling these items. Always cut away from your body and keep fingers clear of the blade’s path. Use a stable work surface to prevent accidental slips.
Proper storage is crucial; sheathe knives and secure broadheads when not in use. Dispose of blade waste responsibly, using a puncture-proof container. Never attempt to catch a falling sharp object. Prioritize safety to avoid cuts and injuries during the mixing process; focus and awareness are paramount.
Eye Protection & Gloves
Adhesives and small debris generated during bolt mixing can pose risks to your eyes. Always wear safety glasses or goggles to shield against splashes and flying particles. Consider a full face shield for tasks involving significant adhesive application or broadhead handling. Protecting your vision is non-negotiable.
Furthermore, adhesives can irritate skin, and handling sharp components requires protection. Wear appropriate gloves – nitrile or latex are excellent choices – to prevent skin contact and maintain a secure grip. Inspect gloves for tears before use and replace them if damaged. Prioritize hand and eye safety throughout the entire process.